
Stitches used in this kit
Watch the video or click the stitch diagram to be taken to the full tutorial!
Backstitch

Bring needle UP at 1. Insert needle DOWN at 2 making a stitch backwards along the line to meet last stitch. Come UP at 3 a stitch length away from 1. Continue along line.
Chain Stitch
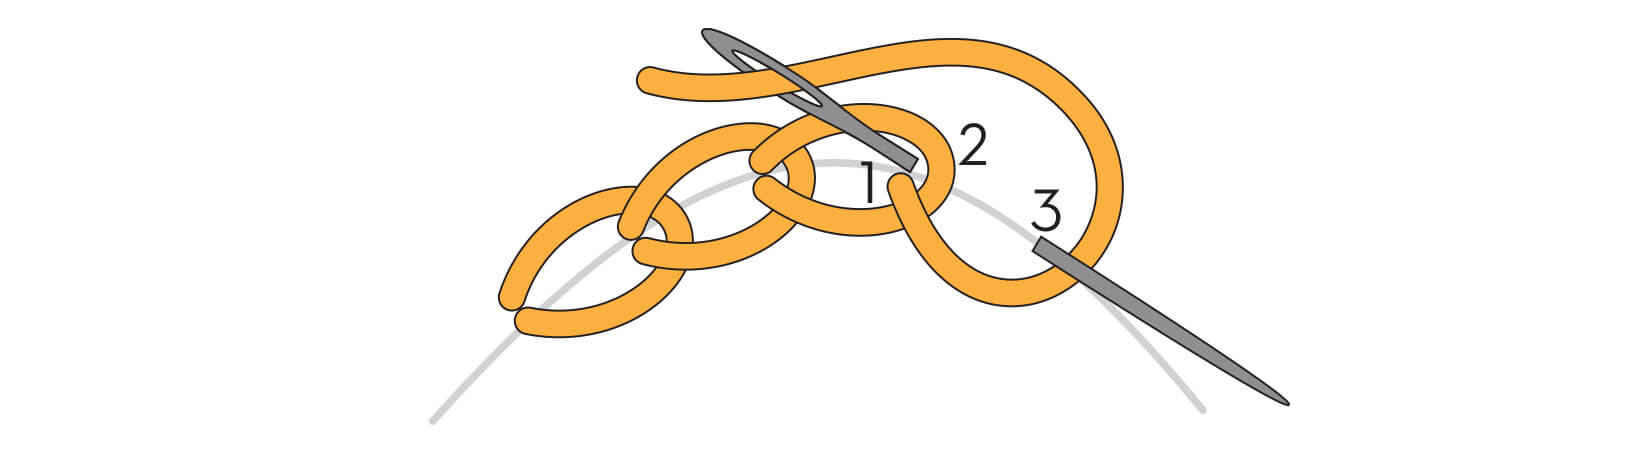
Bring needle UP at 1. Insert needle DOWN at 2 through same hold as 1. In the same motion, come UP at 3. Loop floss under needle and pull needle through the loop. Continue along line. To end a row, make a tiny stitch over loop, securing it in place (4).
French Knot Stitch

Bring needle UP at 1. Point needle away from fabric. Wrap floss around the needle twice. Now point the needle towards fabric and insert needle point at 2, a few fabric threads from 1. Pull floss snug against needle and fabric. Slowly pull needle DOWN to back of fabric until knot is secure.
Satin Stitch

Bring needle UP at 1 on edge of shape. Insert needle DOWN directly across on opposite edge of shape at 2. Come UP at 3 on first edge of shape, one to three fabric threads away from 1. Continue filling in shape with stitches.
Buy the pattern!

Penguins Embroidery Kit
